
Database administration is one of the most delicate and most responsible actions that both administrators and IT users assume since they store sensitive data and have a high impact on the organization. Something that is more relevant when working with databases is what manager we have to use since based on the security, availability and integrity of this database, these databases will be better managed, so if the manager is unreliable We will have erroneous steps.
MySQL has become one of the main database engines most used in the world for its various features, functions and integrations with other languages. Here phpMyAdmin comes into play as an integral solution to manage the databases that are generated with MySQL offering us even more advanced control and support alternatives. Today we will see it applied to the CentOS 8 system.
Solvetic will explain what phpMyAdmin is and how to install it on CentOS 8.
What is phpMyAdmin
phpMyAdmin has been developed by the software company Maguma, as a totally free software tool which has been written in the PHP language, and whose main purpose is to efficiently manage everything related to MySQL on the Web.
When using phpMyAdmin, we will be using a tool that is compatible with various operations in MySQL and MariaDB associated with common tasks in tables, columns, relationships, indexes, users, permissions and others, but best of all, these tasks can be managed directly in the user interface thus facilitating its final management.
PhpMyAdmin features
Some of the most outstanding features of phpMyAdmin are:
- It integrates a maintenance server, databases and tables which are based on the server configuration.
- It has an intuitive web interface.
- You can execute most MySQL features such as browsing databases, tables, views, fields and indexes, creating, copying, dropping, renaming or altering databases, running, editing and marking SQL statements (including batch queries), administration of user accounts and MySQL privileges.
- phpMyAdmin executes global searches in a database or a subset of them.
- phpMyAdmin creates and reads dumps of tables in the database.
- You can export the data to various formats such as CSV, XML, PDF, ISO / IEC 26300 - OpenDocument Text and Spreadsheet, Microsoft Word 2000 and LATEX.
- It facilitates the administration of multiple servers.
- It is capable of creating PDF graphics of the current database design.
- Check referential integrity in MyISAM tables.
- It has more than 80 languages available.
- phpMyAdmin is compatible with InnoDB tables and foreign keys.
- It allows to visualize the changes in databases, tables and views.
Now Solvetic will explain how to install phpMyAdmin on CentOS 8 and thus have one of the most useful tools to manage MySQL.
1. Install phpMyAdmin on CentOS 8
Step 1
The first step will be to install the Apache web server, for this we will execute the following:
yum install httpd -y

Step 2
Once this process is finished we will see the following:

Step 3
We will check the status of the web server in CentOS 8 by running:
systemctl status httpd

Step 1
In this case we see that the service is not active, to proceed with its authorization we must execute the following:
systemctl start httpd

Step 4
To disable Apache we must execute the following:
systemctl disable httpdto stop it:
systemctl stop httpdTo enable it on system startup:
systemctl enable httpd
Step 5
To verify that Apache works as expected, we must know the IP of the server, this can be found with the “ip add” command:

Step 6
We will enable and authorize the Apache service in the CentOS 8 firewall, for them we execute the following lines:
firewall-cmd --permanent --add-port = 80 / tcp firewall-cmd --permanent --add-port = 443 / tcpThen we load the firewall again:
firewall-cmd –reload

Step 7
To check Apache we go to a browser and enter the following syntax:
http: // IP_address
Step 8
The result should be similar to this:

2. Install EPEL repositories in CentOS 8
EPEL (Extra Packages for Enterprise Linux) repositories are packages specially designed for the administration of business repositories focused on extra system functions$config[ads_text5] not found
Step 1
For this enablement we must use the following command:
yum install epel-release

Step 2
Enter the letter S to confirm the download and installation:

3. Install phpMyAdmin on CentOS 8
Step 1
Finally we are ready to install phpMyAdmin, for this we will first download the latest version 4.9.1 by running the following:
https://files.phpmyadmin.net/phpMyAdmin/4.9.1/phpMyAdmin-4.9.1-all-languages.tar.gz$config[ads_text6] not found

Note
The versions can be verified at the following official phpMyAdmin link:
PhpMyAdmin versions
Step 2
We will install phpMyAdmin using the following line:
tar -zxvf phpMyAdmin-4.9.1-all-languages.tar.gz

Step 3
Finally we can move phpMyAdmin to the desired route:
mv phpMyAdmin-4.9.1-all-languages / usr / share / phpMyAdmin

4. Configure the phpMyAdmin file in CentOS 8
This configuration allows access to the phpMyAdmin client remotely$config[ads_text5] not found
Step 1
To do this we go to the file phpMyAdmin.conf which is located in the directory / usr / share / phpMyAdmin / with some text editor:
/usr/share/phpMyAdmin/config.inc.php

Step 2
In the blowfish_secret line we will generate a new secret key and this can be created from the following link:
Blowfish keys

Step 3
We save the changes using the following key combination:
Ctrl + O
We leave the editor using:
$config[ads_text6] not foundCtrl + X
Step 4
Now we will create a virtual file located in the /etc/nginx/conf.d directory:
nano /etc/nginx/conf.d/phpMyAdmin.conf
Step 5
There we will paste the following:
server {listen 80; server_name “domain name; root / usr / share / phpMyAdmin; location / {index index.php; } ## Images and static content is treated different location ~ * ^. +. (Jpg | jpeg | gif | css | png | js | ico | xml) $ {access_log off; you expire 30d; } location ~ /\.ht {deny all; } location ~ / (libraries | setup / frames | setup / libs) {deny all; return 404; } location ~ \ .php $ {include / etc / nginx / fastcgi_params; fastcgi_pass 127.0.0.1:9000; fastcgi_index index.php; fastcgi_param SCRIPT_FILENAME / usr / share / phpMyAdmin $ fastcgi_script_name; }} Step 6
When we enter this text we save the changes using the following key combination:
Ctrl + O
We leave the editor using:
Ctrl + X
Step 7
Now we will execute the following which will create a temporary directory of phpMyAdmin and proceed to grant the respective permissions:
mkdir / usr / share / phpMyAdmin / tmp chmod 777 / usr / share / phpMyAdmin / tmp

Step 8
Then we set the owner of the file:
chown -R apache: apache / usr / share / phpMyAdmin
Step 9
Now we restart the services:
systemctl restart nginx systemctl restart php-fpm$config[ads_text5] not found
Step 10
Finally we grant the firewall permissions for external connectivity:
firewall-cmd --permanent --add-service = http firewall-cmd –reload

At this point we will be ready to access phpMyAdmin but Solvetic will explain something important, with this process (which can be complex), the repository for CentOS 8 does not include simple installation with the command “yum install phpadmin” which greatly simplifies the process, this does not mean that it is not possible and that is why before seeing the phpMyAdmin environment we will explain that other method and you decide the appropriate way to install phpMyAdmin in CentOS 8.
$config[ads_text5] not found5. Install phpMyAdmin on CentOS 8 using REMI repositories on CentOS 8
These are other types of repositories which have been developed by third parties whose objective is to provide users with the latest versions of PHP, full functions and other software for both Fedora and Enterprise Linux users (RHEL, CentOS, Oracle, Scientific Linux) .
Step 1
In these REMI repositories we find:
- Packages are incompatible with Fedora policy.
- Package backports available in Fedora development versions.
- Beta versions and much more.
Step 2
To install these repositories we will execute the following:
rpm -Uvh http://rpms.famillecollet.com/enterprise/remi-release-8.rpm

Step 3
After enabling the Remi repository in CentOS 8, we will install phpMyAdmin through the yum package manager, so all the dependencies will be installed automatically, let's run the following:
yum --enablerepo = remi, remi-test install phpMyAdmin

Step 4
There we enter the letter S to confirm the download and installation of the phpMyAdmin dependencies:

Step 5
Later we must accept the installation of the GPG key of the repository:

Step 6
When this process ends we will see the following:

Step 7
It is time to configure phpMyAdmin, at this point phpMyAdmin by default can only be accessed from localhost, so, if we want to access externally, it will be necessary to edit the Apache configuration file of phpMyAdmin with the following command:
sudo nano /etc/httpd/conf.d/phpMyAdmin.conf$config[ads_text6] not found
Step 8
There we will see the following:

Step 9
We locate the "Require" line and change "local" to "all granted":

Step 10
We save the changes using the following key combination:
Ctrl + O
We leave the editor using:
Ctrl + X
Step 11
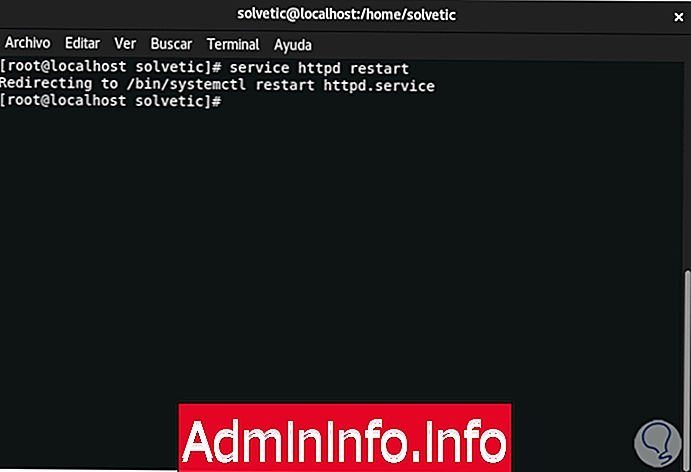
Finally we restart the Apache service:
service httpd restart
Step 12
Now we can access externally from any browser by entering the following:
http: // IP_address / phpMyAdmin /

Step 13
There we can change the language and log in with the MySQL user credentials:

Step 14
Click on Continue and this will be the phpMyAdmin environment:

Step 15
In this main section we find details such as:
- Server type
- Server connection
- Server version
- User who is logged in
- Type of characters
- Apache Version
- Base Client Versions
- PHP version
- PhpMyAdmin version
Step 6
In addition to this we can apply some general appearance adjustments. In the SQL tab we can execute sequences from the database:

Step 17
In the Current Status tab we can visualize the current traffic, as well as processes, query statistics and more:

Step 18
In user accounts we will observe the users registered in the database and we can add new users, as well as edit or delete the current ones:

- In the Export and Import section we can bring or send the database configurations.
- In the Configuration tab it is possible to adjust phpMyAdmin concepts:

Step 19
In the Binary Registry section we access the queries of the created binary records:

Step 20
In the "Replication" tab we have the way to execute the database replication:

Step 21
In the “More” tab we can access additional functions:

Step 22
Finally we will have all the SQL statements available to manage the database elements:

As you can see, this last process is much easier to use to install and use phpMyAdmin in CentOS 8 and thus manage the databases in a centralized and total way.
Articles